Affiliate Disclosure: Some of the links on this page are Affiliate Links for the painting products used in the tutorial. This site receives a small commission if you click on a link and purchase the product, but there is no additional cost to you. Thanks for your support!
Introduction
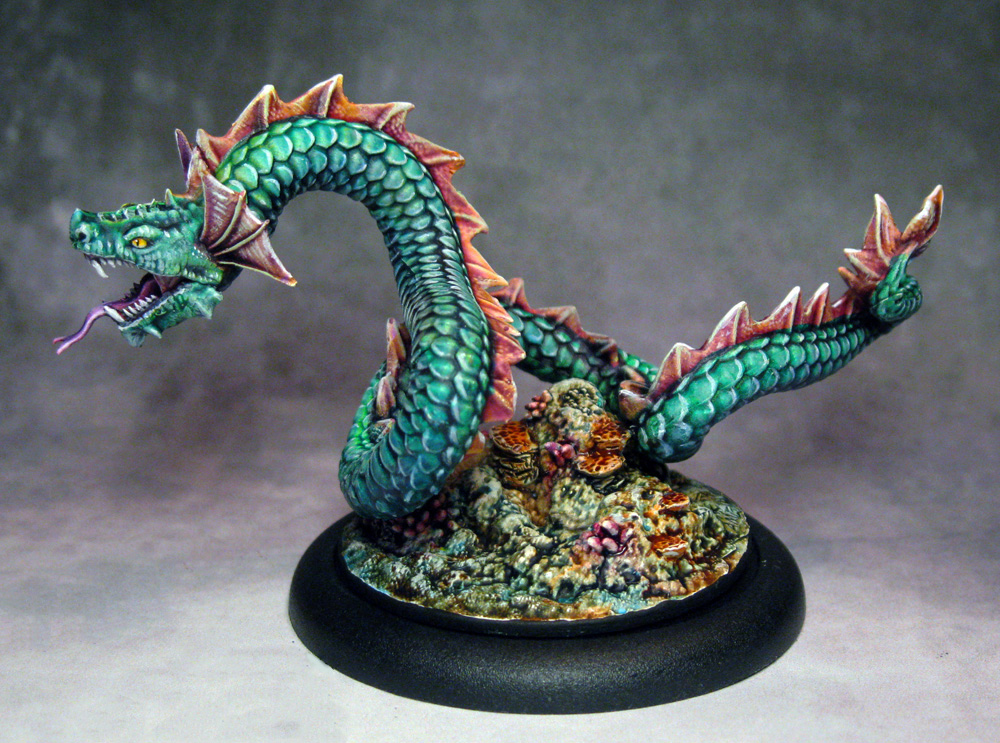
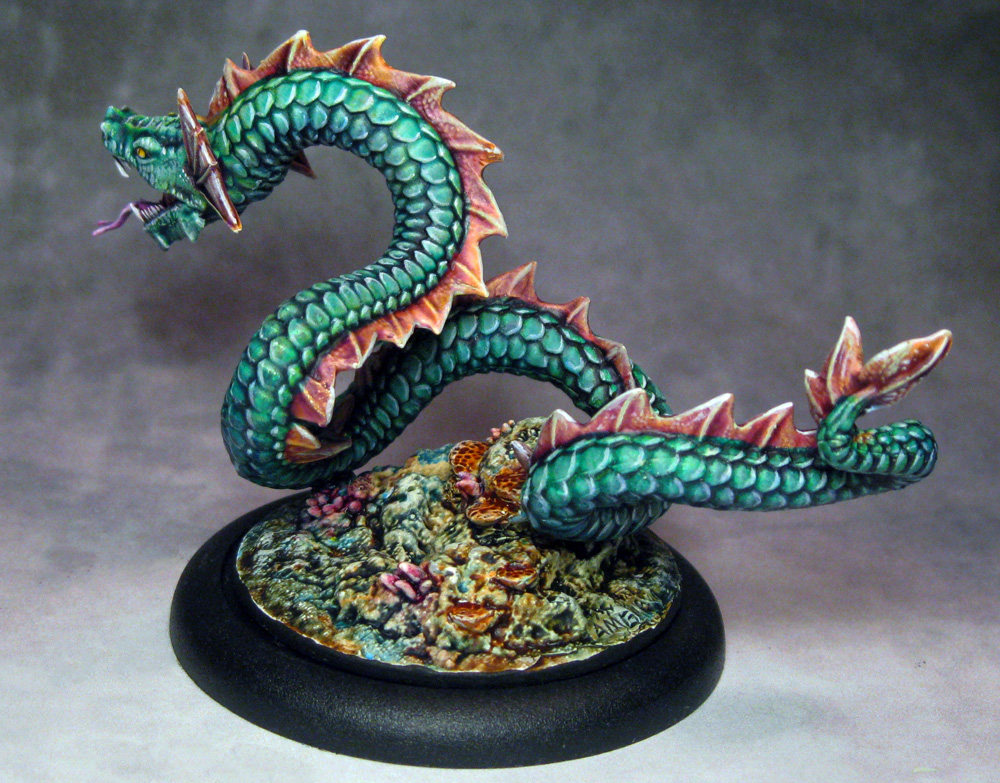
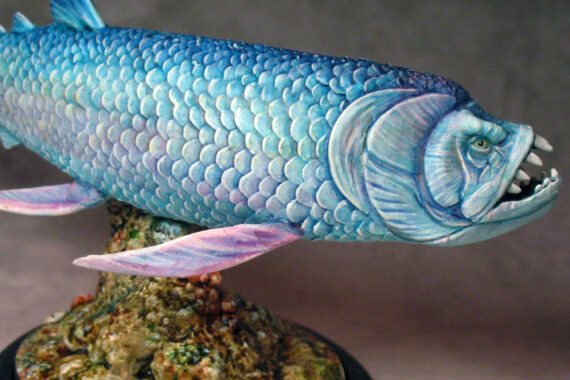
Here is one more step by step painting tutorial for the Sea Serpent for DeepWars, Blood Reef. This scaly creature is related to dragons so it has very heavy scales that work well with washes and glazes. Inks glazes and washes are done with Liquitex Pro inks and the Matte Medium is by Liquitex. Paints are Golden Fluid Acrylics. White and black are standard Americana brand craft paint by Deco Art.
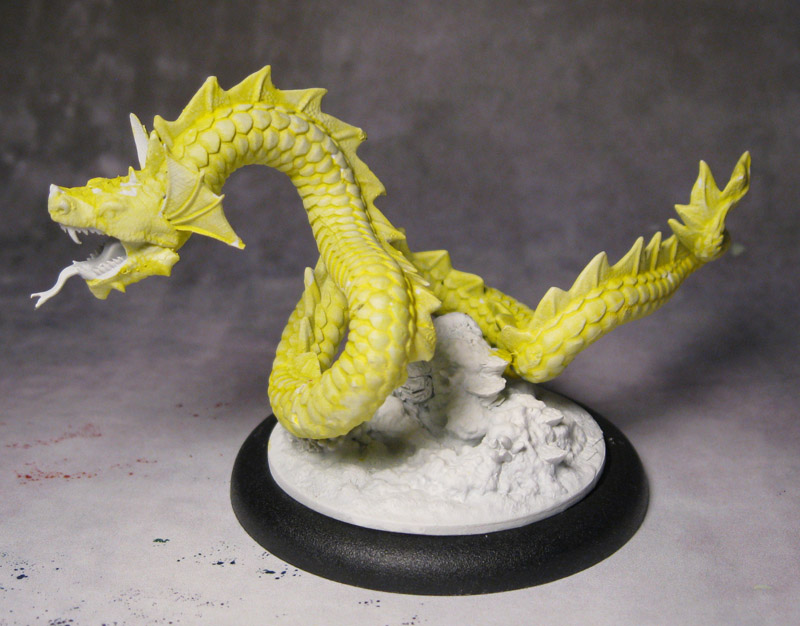
Step 1
The first step was to paint the whole body in a light yellow shade over white primer, leaving only the mouth white. This was left to dry.
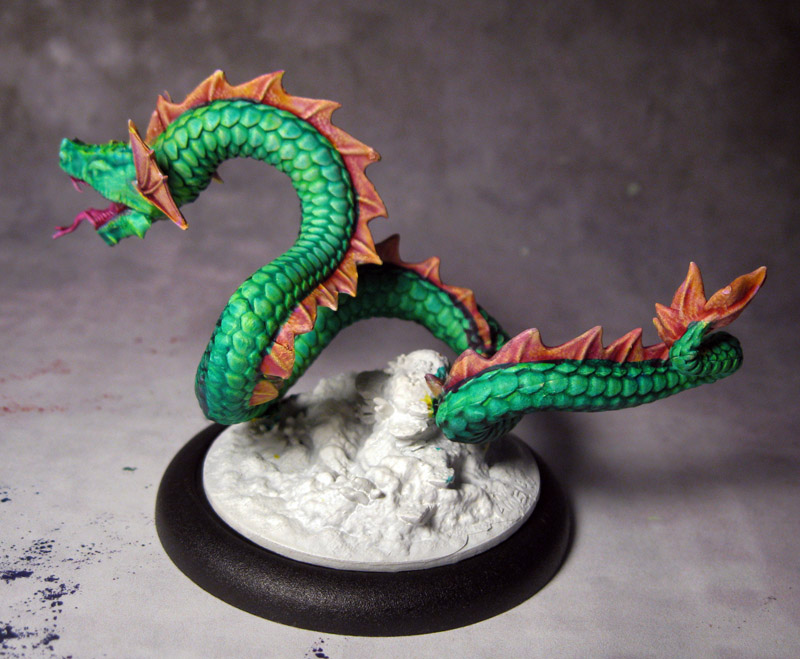
Step 2
Next, the body was given a wash of Pthalho Green ink, mixed with a touch of Sap Green ink, mixed with Matte Medium and water. The fins and mouth were washed with a Magenta ink, medium and water mix. The ratio of ink/medium/water was around 40/40/20. This was allowed to dry fully before the next step.
Step 3
Now comes the ugly step of shading down everything. The body, fins and mouth was washed with a mixture of Violet ink and a bit of black paint to darken it, and mixed with medium and water. The ratio was 20/30/50, so thin enough to go into all of the cracks but not so dark that it stained all of the green into oblivion. This was allowed to dry fully before moving onto highlighting.
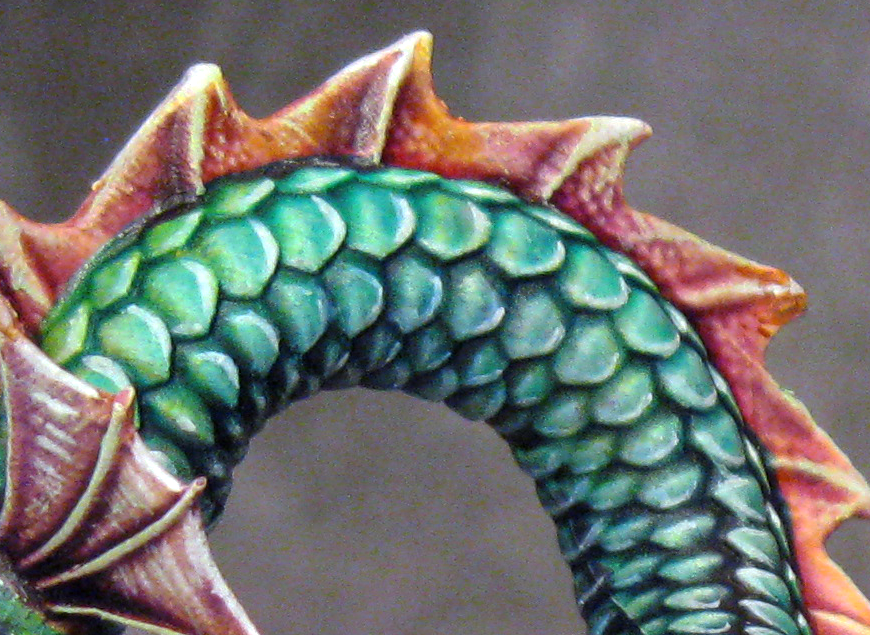
Step 4
Finally, the step that makes everything pop out of the shadows again. The scales were lightly drybrushed with wet layers of a mixture of Cerulean Blue ink, Sap Green ink and white paint. This was like a drybrush with a glaze, with the mixture at around 20/80, paint+ink to water. The key was to try to be subtle and give a bit more softness to the shading on the scales. The idea is not to paint completely over the green scales though or even to add a bright blueish highlight. After the glaze-drybrush, edges were painted in thinned white paint using the tip of a brush. This seems a bit tedious but is quicker than you may think since only the portion of the scale facing the light needs to be highlighted. Some scales on the neck behind the head needed a bit more highlight in the center, so a very thin glaze of thinned white was applied with the tip of the brush.
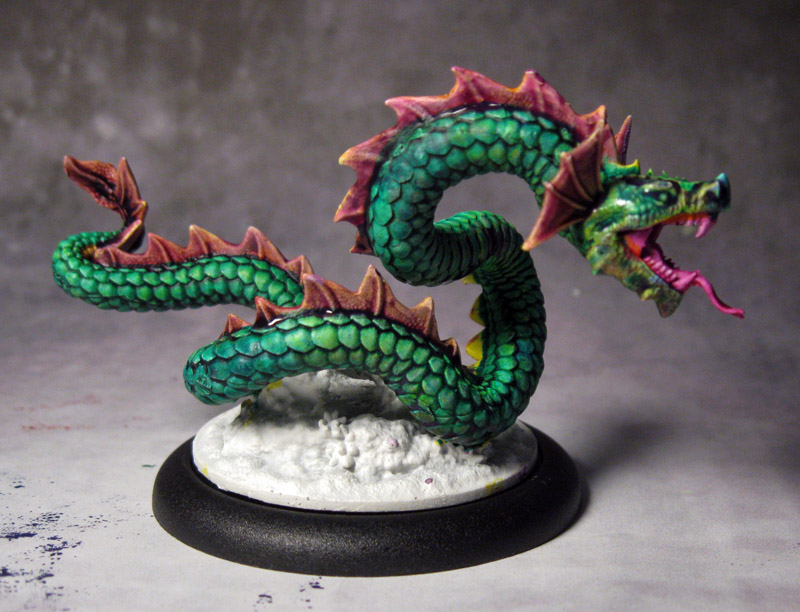
Step 5
The mouth was given washes of black to shade it more, then highlighted with thinned white, then glazed with Magenta ink. The tongue was shaded with Dioxazene purple ink, then highlighted with Magenta ink + white. fins were highlighted on the edges with white, then had some tiny white dots added for additional texture. The eyes were done with yellow over white, shaded with Burnt Sienna ink, then given a black slit pupil and hotspot reflection of pure white.

Step 5
To finish things off, the body was shaded with glazed of Deep Violet ink + black paint + medium and water (20/40/40) ratio of color, medium and water. adding the color more to the bottom of the body. An additional glaze of Pthalho Blue ink was applied to deepen the shadows. When these glazes dried, some scale edge highlights needed to be re-applied.
The base was done with Raw Sienna ink first, then when dry, given a wash of Pthalho Blue ink + medium and water. Corals were glazed in Burnt Sienna ink and Violet ink. When all dry, it was drybrushed with a light golden sand paint.