Affiliate Disclosure: Some of the links on this page are Affiliate Links for the painting products used in the tutorial. This site receives a small commission if you click on a link and purchase the product, but there is no additional cost to you. Thanks for your support!
Introduction
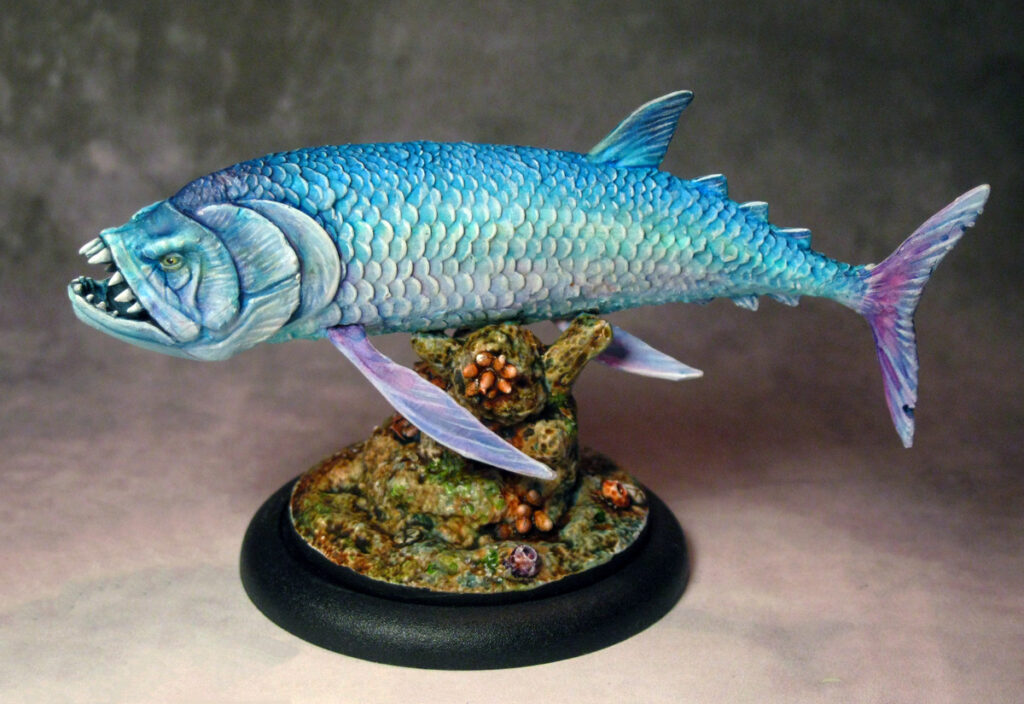
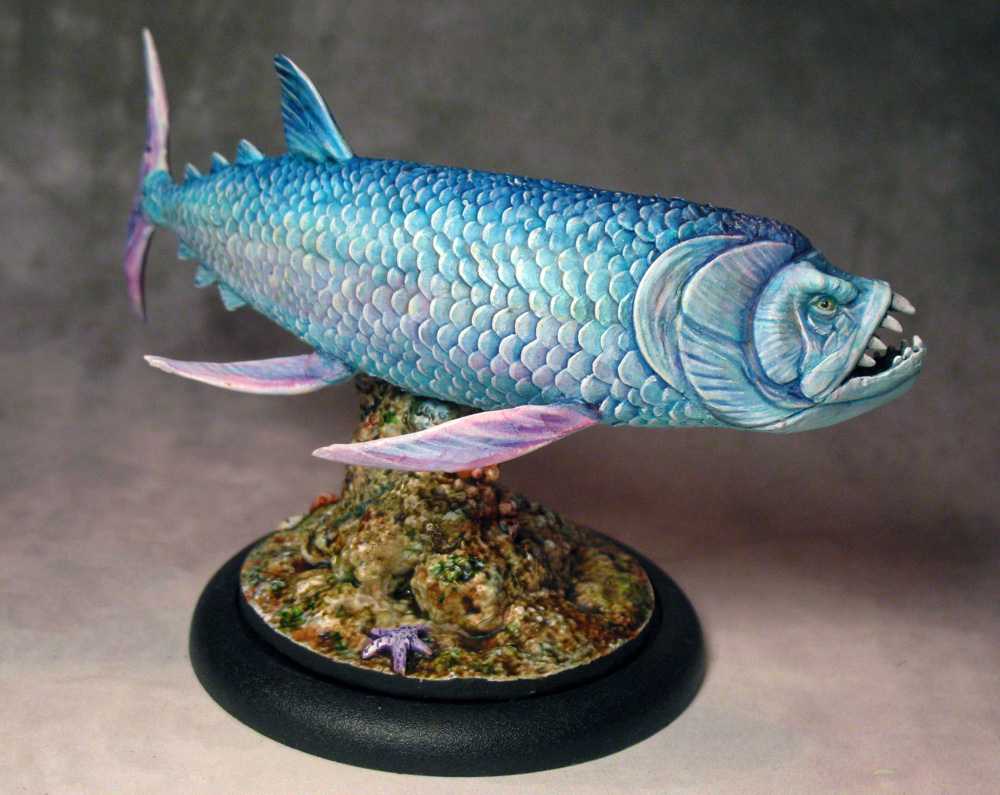
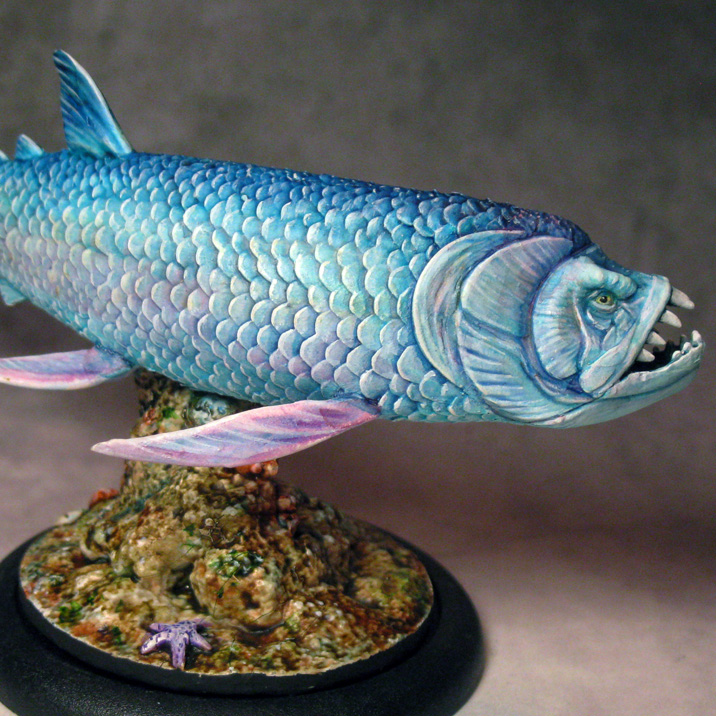
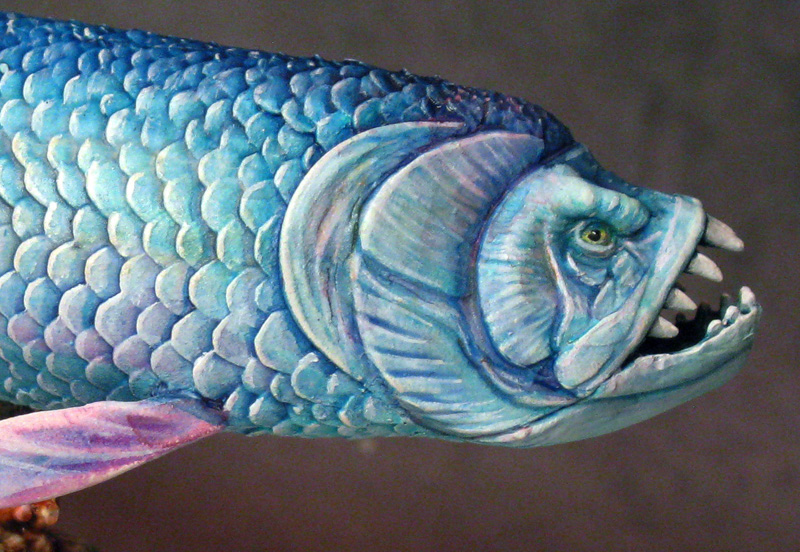
Here is a quick, step-by-step painting guide to the Silver Death Fish for DeepWars. This model is suspiciously similar to an ancient Xiphactinus fish, but has slightly different fins, with a few finlets near the tail, like a tuna. This model was primed in white and painted using the techniques very similar to the Dire Fish-Lizard from the AMG painting guide, Painting Scaly Beasts.
The key is to use washes and glazes to give it the basic colors, then lighten sections with thinned white paint and make edges pop with pure white. The majority of the colors were Liquitex Professional Acrylic Ink, while paint was Golden Fluid Acrylics and Americana white and black. All ink was mixed with Liquitex Matte Medium and water to give it more body to flow into the cracks. Otherwise, it tended to stain the scales instead of flow into them.
Step 1
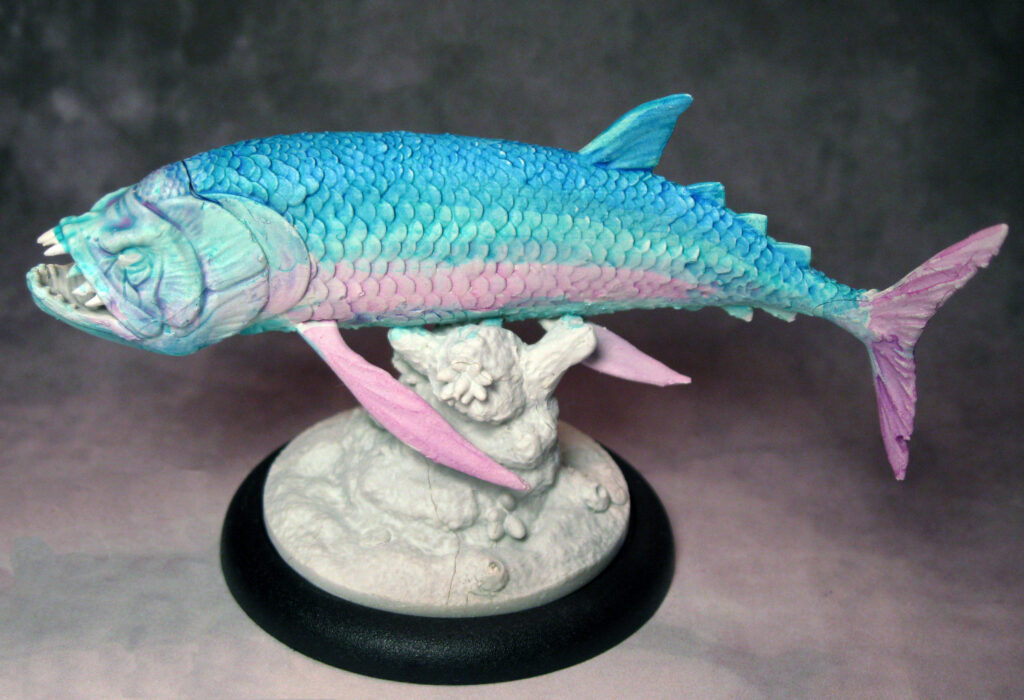
The first step was to paint the upper sides, back with very thin washes, almost glazes, of Deep Turquoise ink and medium. The mixture was around 20% ink, 40% medium and 40% water. These are not exact numbers, but the mixture was light enough to apply color and flow into scales but left a lot of lightness. A key here was to set the model upside down while it dried, so the color did not flow down the entire body. When it was dry, the next color applied was Quinacriadone Magenta ink, painted in a very light glaze around the middle of the body and onto parts of the head and the fins. The mixture was more about the same density as before, but less was held on the brush, so it did not run everywhere. The model was held upside normally while applying this glaze also. Next, the head, belly and lower body was painted with a glaze of the original turquoise mixture. Finally, a wash of Pthalho Blue ink (same medium and water percentage as before) was applied on the top of the back. The model was inverted, and light brush strokes were used to push the glaze further down the back and blend it with the turquoise scales.

Step 2
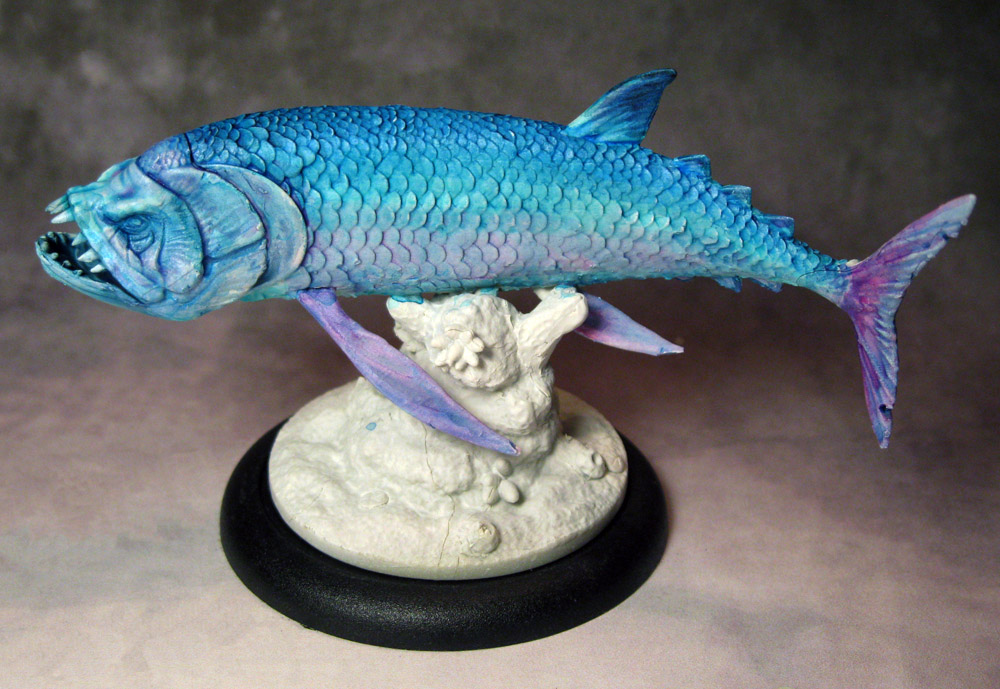
The next step was basic shading, done with more glazes or Pthalho Blue ink on the back andTurquoise ink on the sides, going over the Magenta scales. This glaze was very thin, closer to 10% ink, 40% medium and 50% water, with the here to tie all of the colors together with blue. Also applied were glazes of black paint mixed with Pthalho blue ink onto the top of the back and in the mouth. It looks pretty messy now, but you can make out the basic idea of the light and shadow.

Step 3
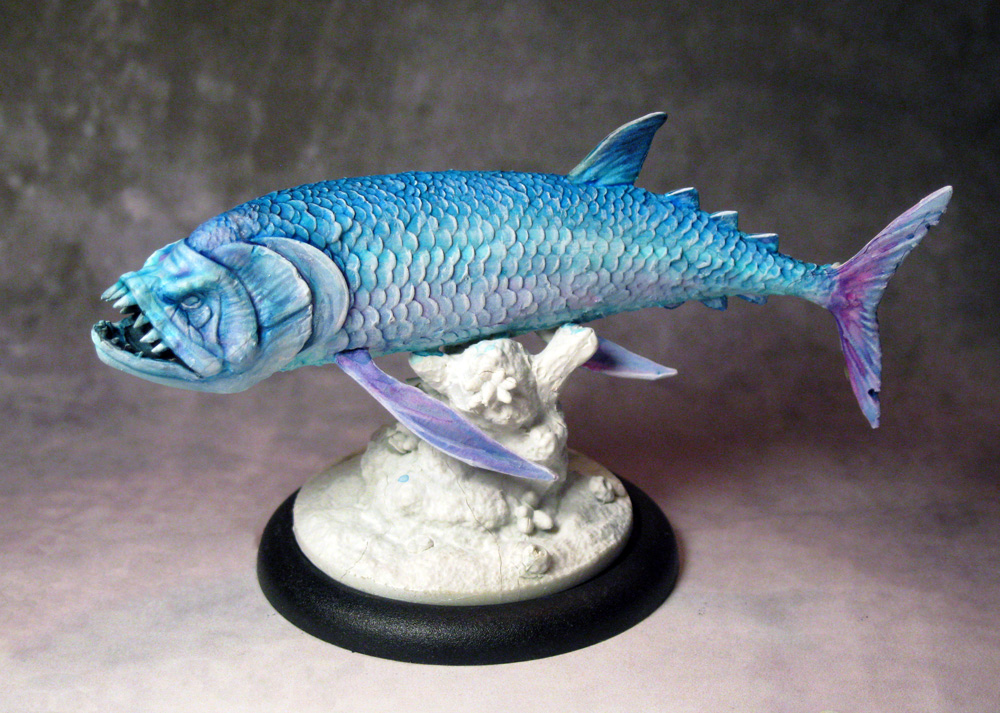
When all of the color had dried, the next stage was adding basic highlights. This was done with slightly thinned white paint, maybe 60/40 paint and water, applied lightly onto areas that would reflect light. This mixture was used with very careful drybrushing in multiple layers on the scales to build up edge highlights. It is important to brush perpendicular to the scales and not scrub in all directions here as otherwise the scales just get a coating of white. The goal is to just do the edges of the scales lightly and build up layers. Also, a glaze of white was applied along the upper third of the body to increase lightness there, allowing it to flow into the cracks and all. This glaze is just paint and water and was “scrubbed” around a bit with the brush to blend it. This technique is also called “feathering” but is basically just quick brush strokes to reduce the sharp edge of the glaze.

Step 4
The final stage was done with edge highlights of more white paint, mixed with less water, around 80% paint, 20% water. This mixture was used for some edge drybrushing on the scales, and on the fins and teeth, with some additional black paint glazed in the mouth and around the base of the teeth. This mixture was uses with a fine brush to pick out scales using the tip of the brush to add highlights where the drybrush missed. Some pure white paint was used on scales that were lightened in the previous step. On the fins, the edges were highlighted with 80/20 white, but some fine line details were added with 50/50 white using a fine-tipped brush. To finish off the glazes, a light mixture of Raw Sienna ink and Primary Yellow paint (10% color, 40% medium, 50% water) was applied along the middle of the body, above the magenta section, and on the head and around the eye. The eye was painted with a mixture of yellow and white paint, with a black pupil and a tiny dot of pure white for a hotspot reflection.

Step 5
The base was done in steps similar to the body, with a wash of Burnt Sienna paint, medium and water (20/40/40), then when dry, two washes of Pthalho Blue ink (20/40/40) to build up color. The base had some small cracks in it that were filled with extra Matte Medium and allowed to dry, then painting over them. Sections of sponges were painted with Pure Burnt Sienna ink and the starfish was done with Dioxazene Purple ink + white paint. Some Sap Green ink was applied as a glaze to add more color to the rock.
